Have you ever seen those very expensive sensory boards for sale? They are unbelievably expensive and even though I’ve always wanted one, the pocketbook would never allow for it. What if I told you that sensory boards for toddlers were easy and inexpensive to make!? Homemade sensory boards can be easy and excellent for sensory development.
This page may contain affiliate links. To view my full affiliate link disclosure, click here. There are Amazon affiliate links in this post. As an Amazon Associate, I make a small commission from Amazon links in this post. Find our privacy policy, terms of service, and more information about user data by visiting the links above.
Does your child like toys? I don’t mean enjoy getting them. I don’t mean like to look at them. I’m not talking about the propensity to clutch them in a death grip when you try to take a toy that has been untouched for months to a donation site. No, I’m talking about actual enjoyment of playing with them.
It’s probably just a phase for my almost 1-year-old, but the kid has no interest in toys whatsoever. He enjoys throwing his cars and pushing his large train around. That. Is. It.
Again, he is only a few days shy of 1-year, so it’s developmentally fairly normal. But still, he has an entire house of toys! Not even a smudge of interest in any of them.
Instead, the child is obsessed with my decorative display of pinecones. He loves pulling himself up, grabbing a couple, and ripping them apart. He also very much enjoys waiting until all the towels are neatly folded, opening the cupboard, and pulling them all out.
Don’t even get me started on the dog balls. The dog is actually scared to take her balls out because she knows the little crawling minion will be on her like bacon ready to throw them all across the room. The classic pots and pans are actually quite cute, and I don’t mind when he destroys my kitchen. But I truly mean DESTROY! I’m dreading the day when he figures out the fridge door!
Homemade Sensory Boards
The only other thing he is obsessed with more is door stops. Yes, the door stops. You know those little metal ones that are wound up. He will sit and hit one until it falls off. Then he will stick it in his mouth and crawl around the house like he just found a bone.
You get the point. No toys. Destruction. Cuteness. Overall, it’s a summary of a 1-year-old!
But momma needs a break. That’s when I decided to create my own sensory boards for toddlers based on ones I had seen on Pinterest
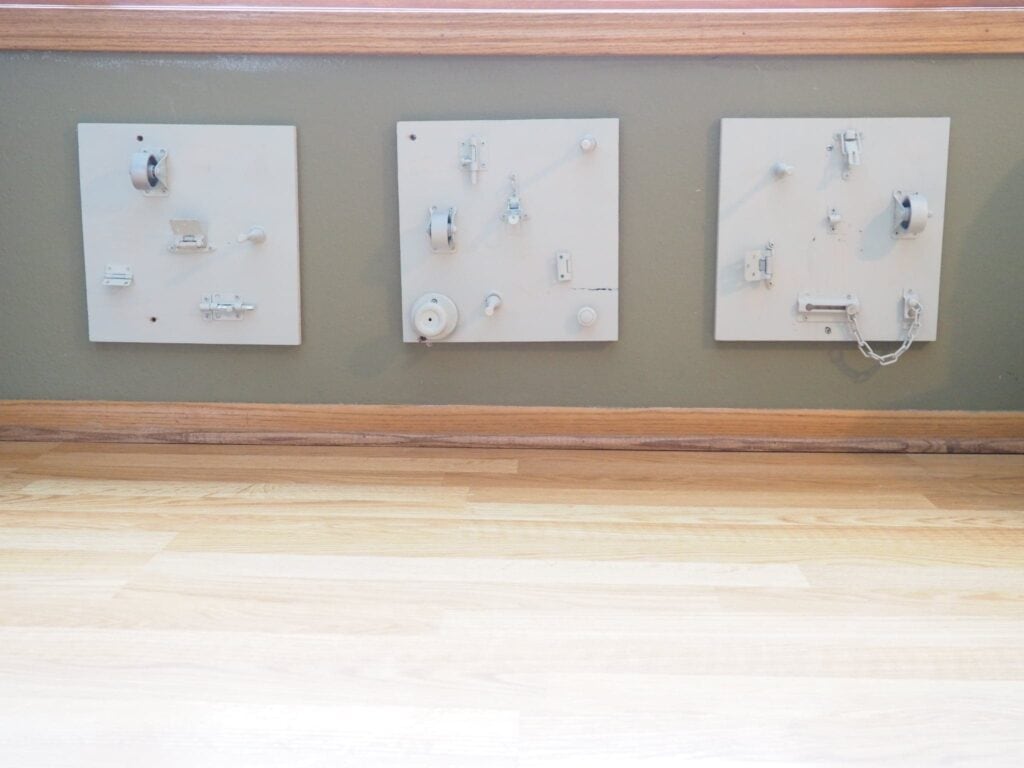
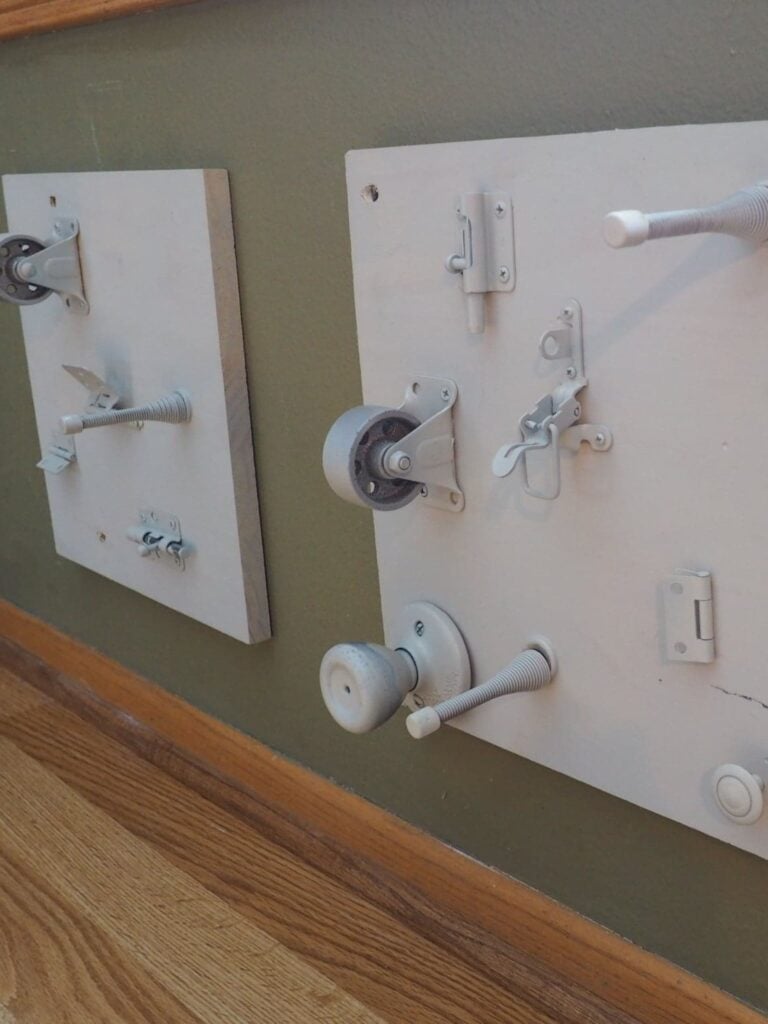
Sensory Boards for Toddler’s Hardware Ideas
Here are some ideas for busy board hardware that you can pick up or ship easily through your local hardware store, or use my Amazon Affiliate links!
We used ½ inch pine boards that were cut into 12×12 pieces. I found that the boards could have ideally been slightly thicker, but the 1/2 inch did work for these purposes.
- Wheels

- Briefcase Latch
- Chain Lock
- Barrel Bolt
- Door Stops
- Small Silver Hinges
- Multi-Colored Knobs
- Door Knobs
- Front Mount Handles
Things I want to add in the future
- Multi- Color Zippers
- Learning Gears
- Door Knocker
The fun part is figuring out how you want to disperse the hardware to intrigue your child to go to the next item. Busy boards will typically grow with the child. Some items will be too tough for them to figure out when they start out. It will be fun to watch my little one learn and grow with the boards.
Most of the sensory items on the board have something for the child to move or manipulate, but a few on our boards are simply there for touch. This adds a little higher mental process for the young child to figure out which ones are movable and which ones are not.
Tips for Creating Sensory Boards
Another consideration is whether to sand the edges of the boards down. I decided I liked the crisp edges of the boards and refrained from sanding them down. I will update as we go along if this was a bad idea.
Once I had my boards screwed tightly down, I made one of my classic impatience bad decisions.
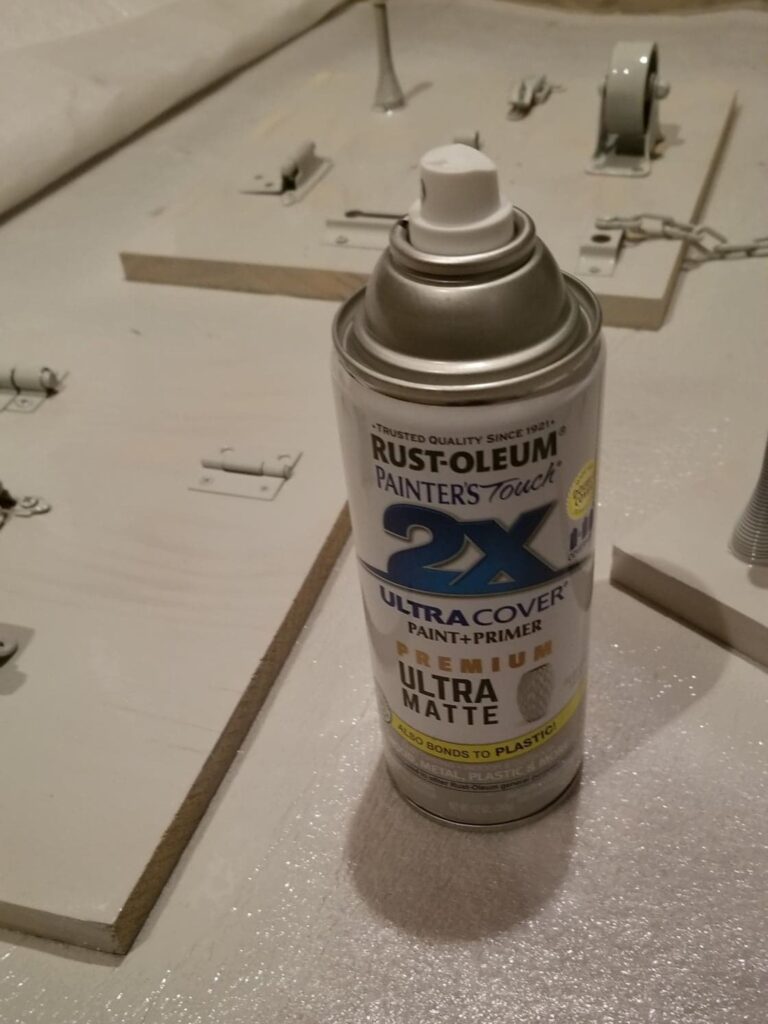
Minnesota is currently in the depths of winter. Without a garage, there is no real place to spray paint anything. I was getting giddy with excitement to see the project complete, so I didn’t want to use classic paint either. So, I made a bad decision and spray painted in our basement.
Don’t. Ever. Do. That.
I’m pretty sure the smell of spray paint won’t be out of the house until spring.
The good news is that Rust-Oleum 2X Paint + Primer was a landslide victory. It went on even, it dried quickly, and it looks fantastic. There is no peeling area, and it seems quite tough and long-lasting.
Regardless, the project is completed and hung under our large living room window. We had to get creative in how to hang the boards as we didn’t want our little one ripping them down. Honestly, it was one of the most fun parts of the project because WyWy just wanted to ‘help’ his daddy the entire time!
It will be fun to watch our little one explore and grow with his busy boards.