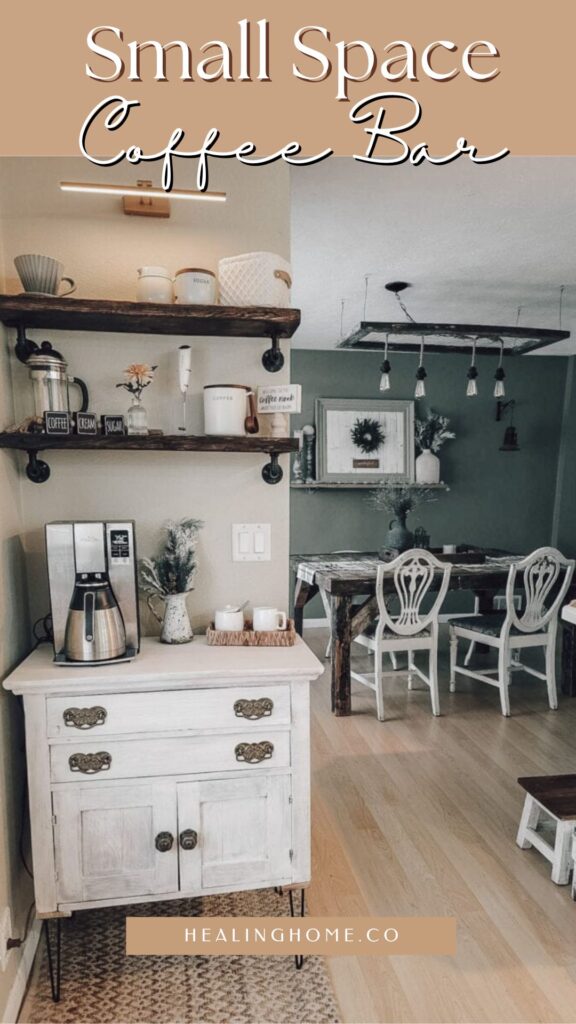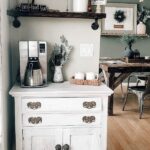
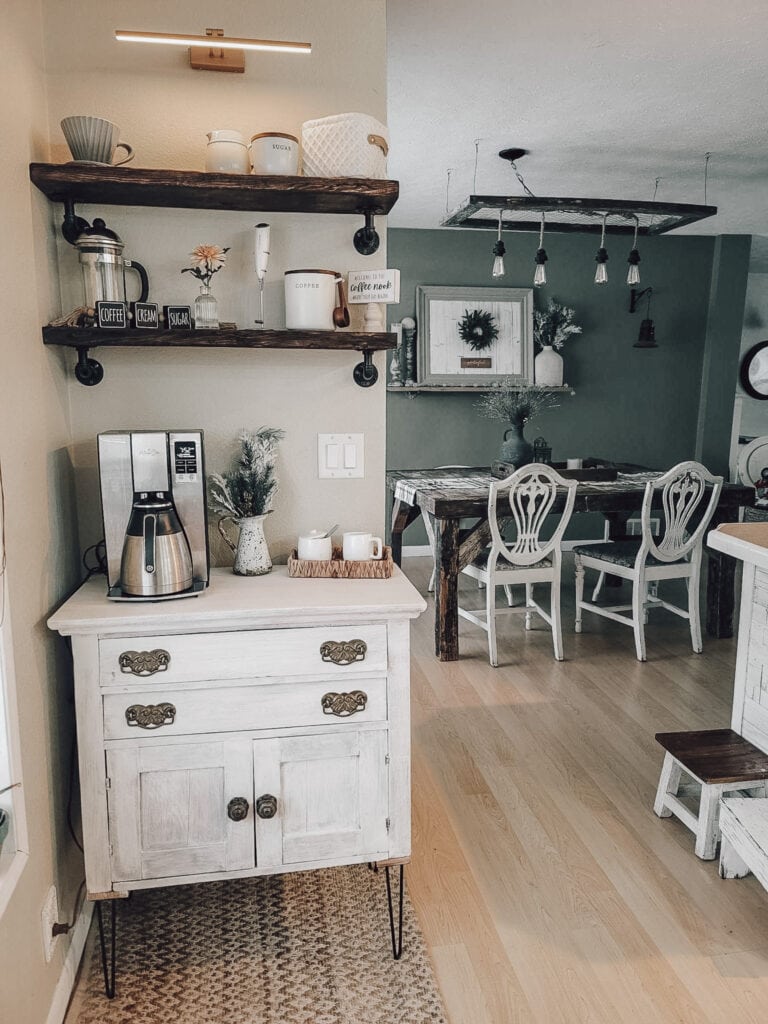
Need some inspiration for a small space DIY coffee bar? You’ve come to the right place. Here is my full story of how we took a small 30-inch corner and transformed it into a beautiful DIY coffee bar.
You all know that I love a good DIY project! Typically I have DIY projects floating around in my head for months or even years before I actually start on them.
However, in the case of this small space coffee bar, the idea literally came out of the blue one day while sharing a cup of espresso at a friend’s house. Her coffee bar was so functional and cute, I started dreaming about having one in my home. Suddenly our little kitchen corner came to mind and within a couple of weeks, I was putting into place our small space coffee bar!
This page may contain affiliate links. To view my full affiliate link disclosure, click here. There are Amazon affiliate links in this post. As an Amazon Associate, I make a small commission from Amazon links in this post. Find our privacy policy, terms of service, and more information about user data by visiting the links above.
Creating this coffee nook was a dream! It got my creative juices flowing and I was basically buzzing with excitement as I walked through our local Home Depot, picked up my dry sink, and browsed through Target dreaming of coffee accessories.
Do DIY projects get you excited too? Let’s be friends! I hope this DIY project inspires you on your own home project.
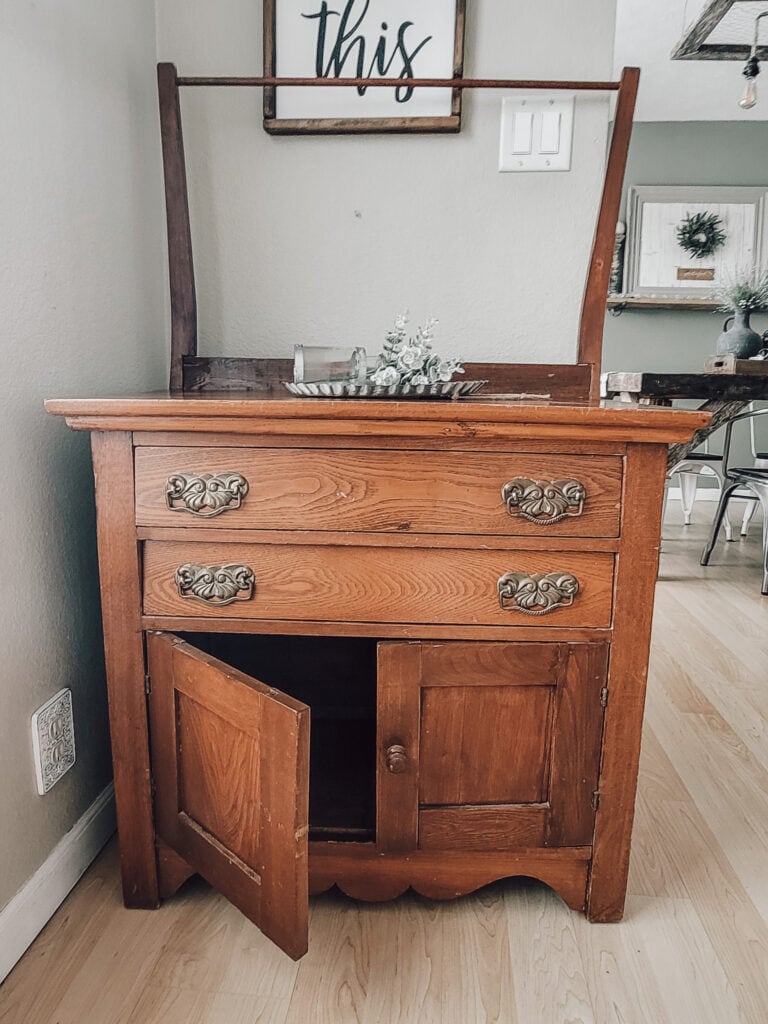
Here is our little ‘before’ picture. The space was simple, but could certainly be used more wisely. A coffee bar was a perfect solution.
Although I didn’t keep perfect records of how much this cost, I do have an estimate for any of you embarking on a similar project.
We did have some supplies on hand. I did not include those in my estimate. Buying materials for the cabinet and shelves came in at just under $200.
Small Space? No Problem!
Do you have little to no room in your kitchen for a coffee bar? I get that problem! Although our kitchen now is rather spacious, it does not have any ‘extra’ room. It is laid out very tightly and besides this little corner that I put the coffee bar in, all other room is taken up.
This coffee nook area is just over 30 inches wide and the ceiling is 8 ft tall.
Although it’s entirely possible to build a coffee area into a small space like this, I think a cuter solution (and much cheaper) is heading to Facebook Marketplace and searching for some keywords like ‘small cabinet’ ‘small bar’ or ‘small hutch’. You will get a variety of results for each of these key terms.
I found this dry sink on Marketplace and immediately knew that it was ‘the one’!
Fixing up the Dry Sink
Fixing up any piece of old furniture takes some time and effort. For this specific project, here are the materials I used:
Materials:
- Wood Glue
- Clamps
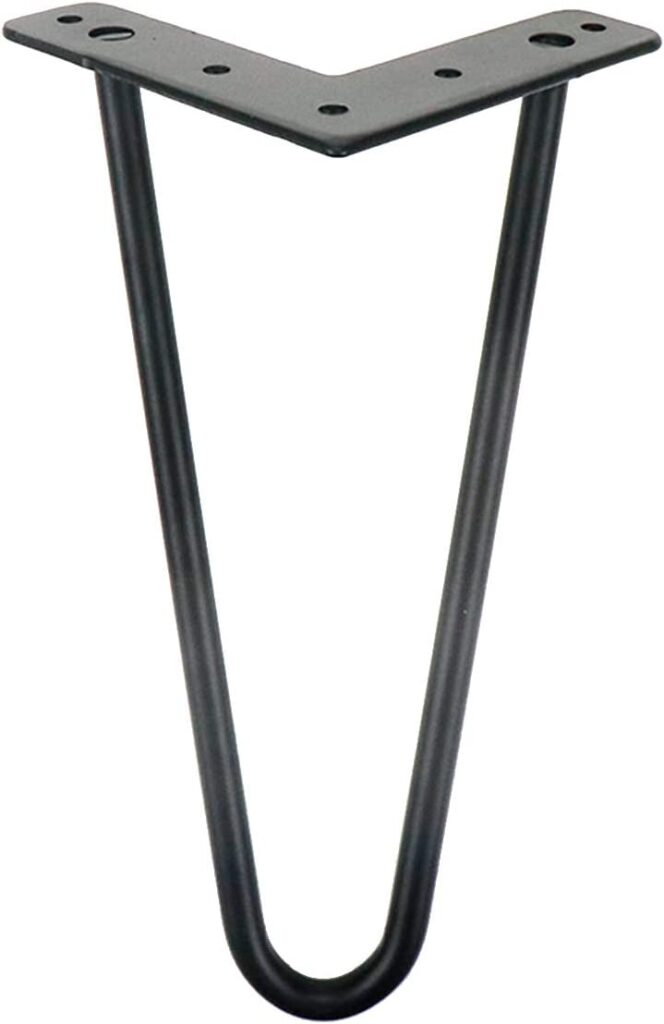
- New Metal Legs
- Chalk Paint – I use Rustoleum Linen White
- Cordless Jig Saw – I use a Bosch Saw
- Paint Brush
- Wax finish – I use Behr from Home Depot

Fixing up the dry sink took a couple of days because we ended up ruining it for a time or two. First, I started by taking off the decorative piece and then my husband jigsawed and remaining bottom off. We did this because the dry sink was shorter than we wanted and we wanted the DIY coffee bar to be about countertop height. This was achieved by adding 10-inch hairpin table legs to each corner.
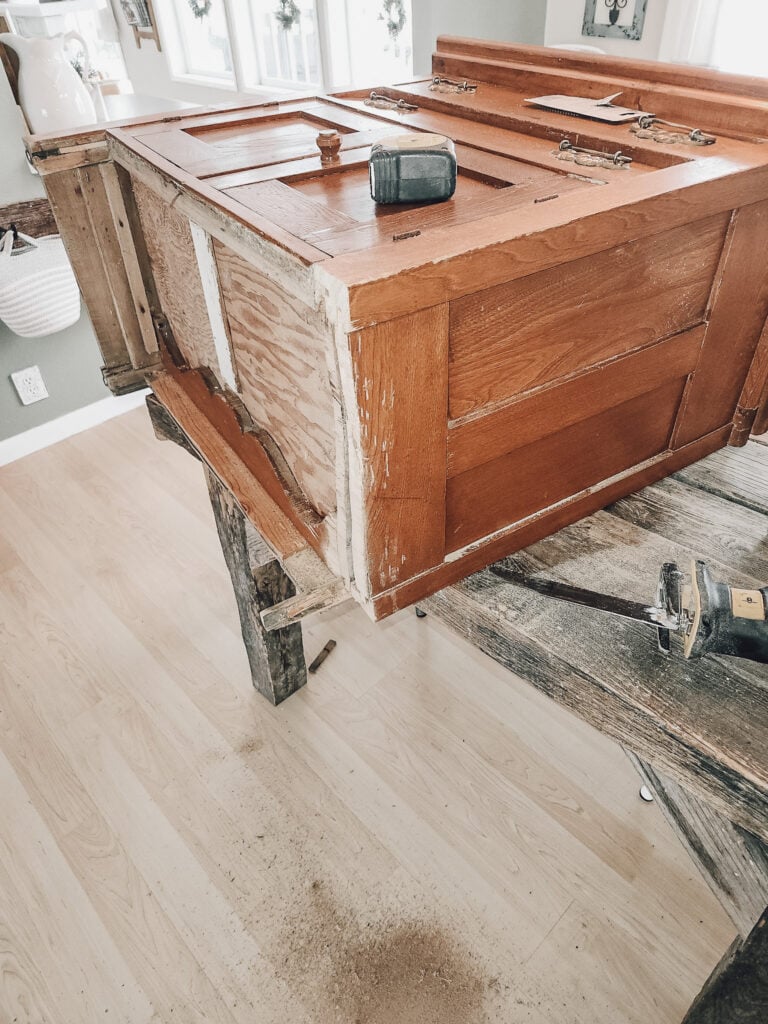
The decorative bar ended up being reused as a bracket to support the bottom of the dry sink.
This piece was so old that all the nails (there we no screws!) and glue were falling out or apart. These old pieces are so beautiful, but they sure take a little bit of extra love to make them function.
I also took the knob off the doors, which was super fun! The knob had a latch that allowed the other door to stay shut.
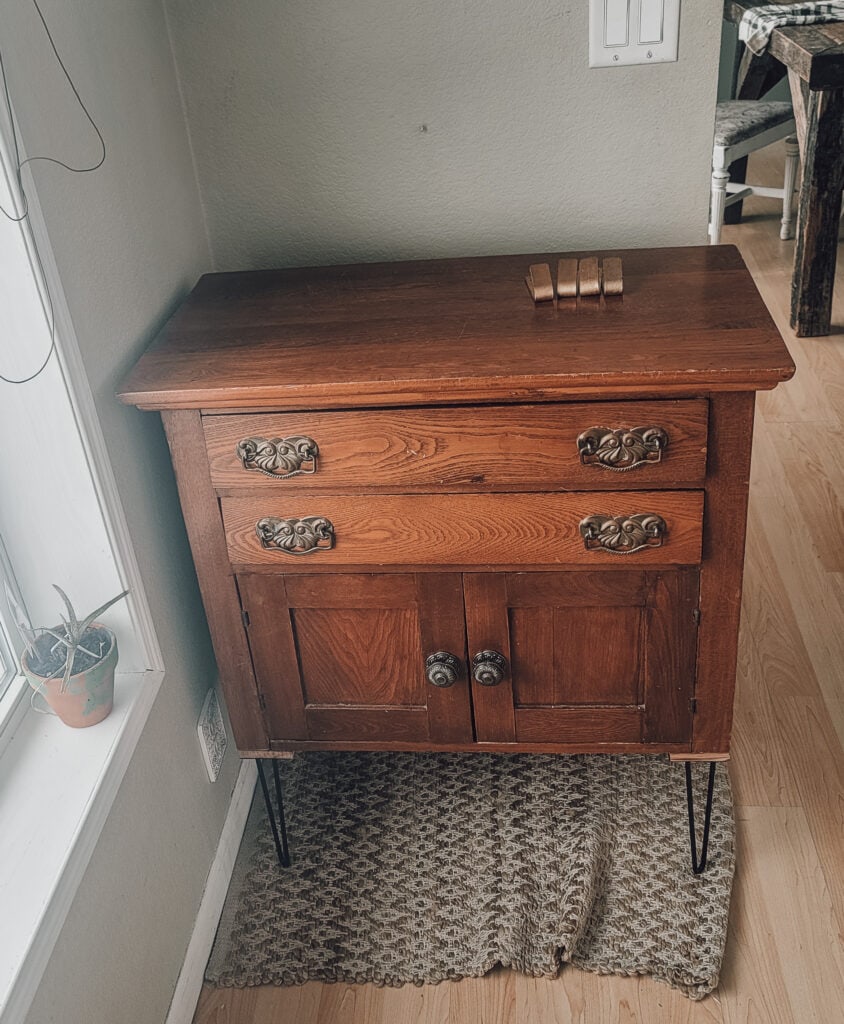
I would have really struggled with the uneven look of having only one knob on the cabinet, so I used some knobs that looked vintage from Hobby Lobby to bring some unity to the piece. Although I cannot link the exact ones I used from Hobby Lobby, these from Amazon are remarkably similar.
The 10-inch hairpin legs were very easy to install on the cabinet, however, we made a sad rookie mistake and didn’t measure correctly. This made the back longer than the front. I was so bummed, but my husband Dan made some shims that didn’t turn out awful and made the cabinet even.
Lesson? Measure, measure, measure!
What we ended up with was a very nice-looking small cabinet to put in the corner of our coffee nook.
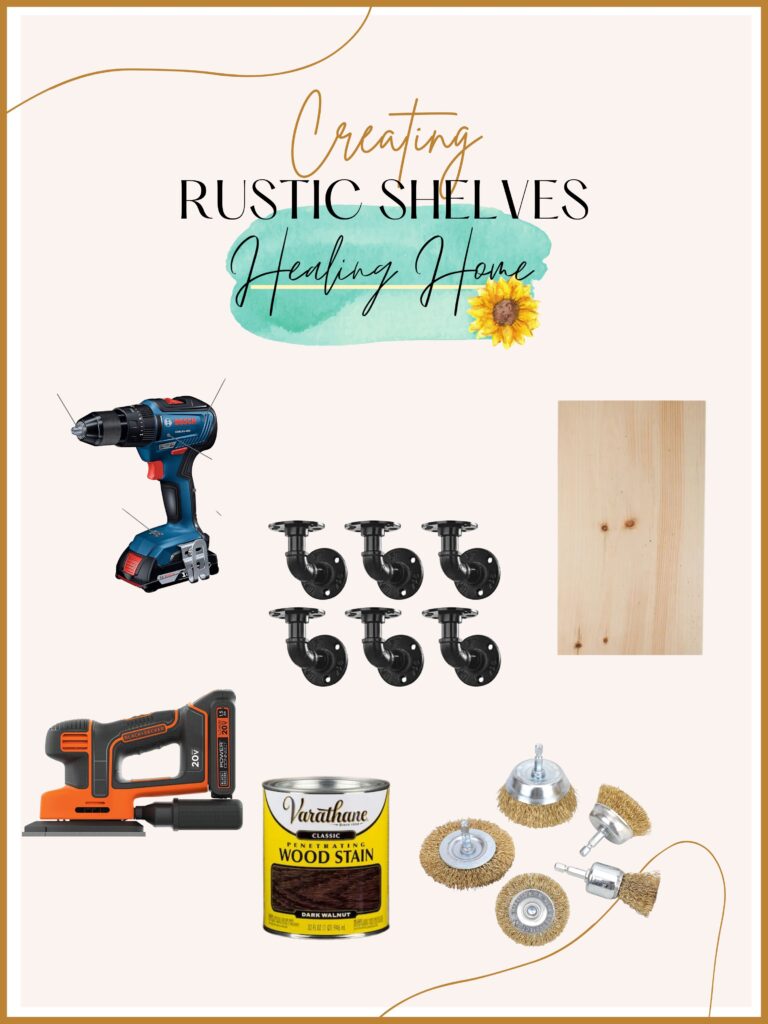
Creating Rustic Floating Shelves
Next up we decided to create some shelves to hold all the most delicious coffee accessories. We someday hope to add an espresso machine to this nook, but currently don’t have the funds. I’ll update this blog post with what we went with once that day comes. We are a big believer in investing in things that are nice, so we are going to take our time to decide on one!
The rustic shelves are my favorite part to make! There are two steps to making them look rustic.
- A good sander – Sand off any rough patches and then move your sander to create grooves on the edges and sides.
- A wire brush – Use this to create sections of rough areas. Really get ‘into’ the wood with the wire brush. You can have creative freedom to make it however rustic you’d like!
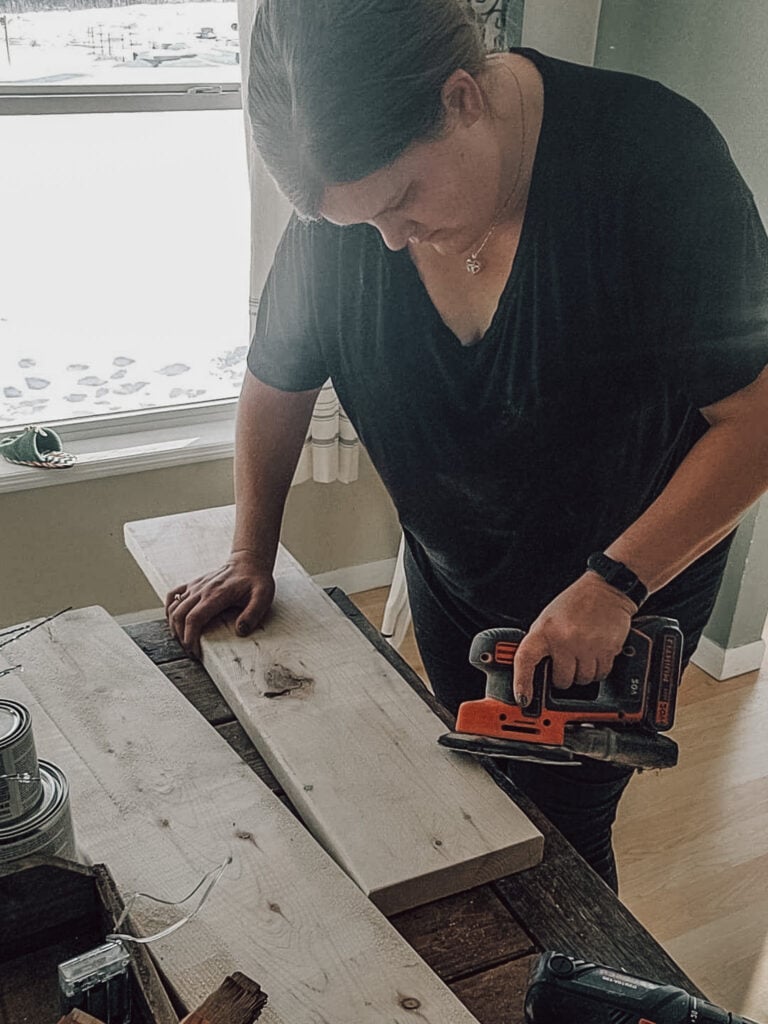
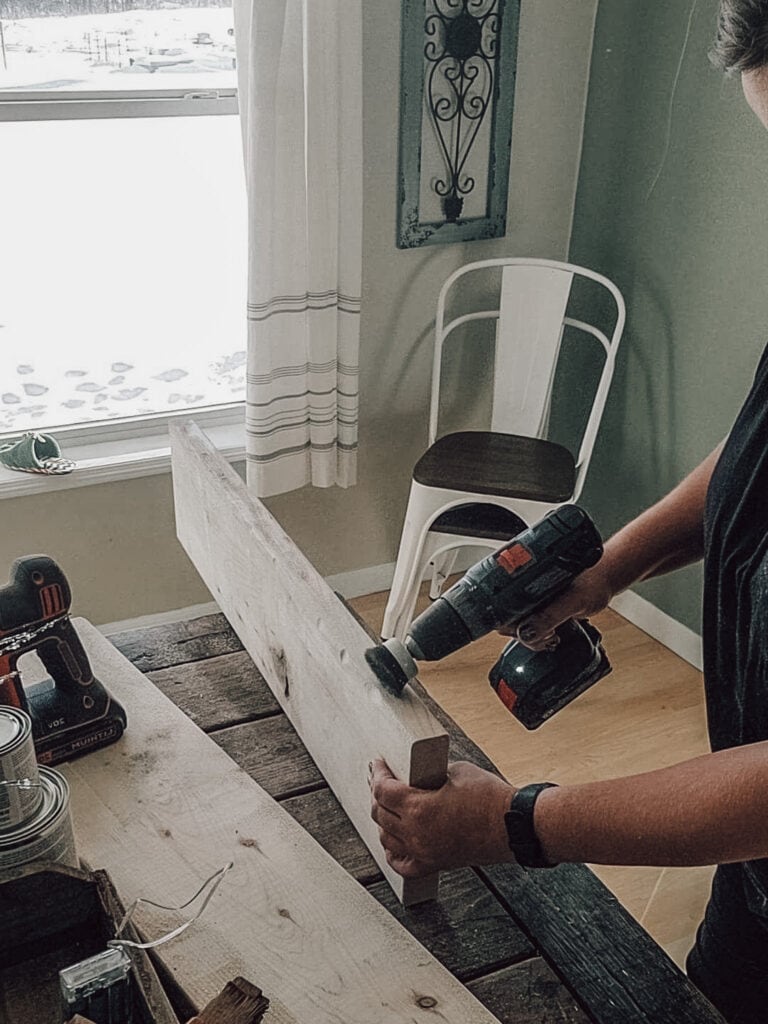
A full tutorial on how to create a rustic look with the sander and wire brush can be found in my floating shelves tutorial.
The shelves were finished with a dark walnut stain.
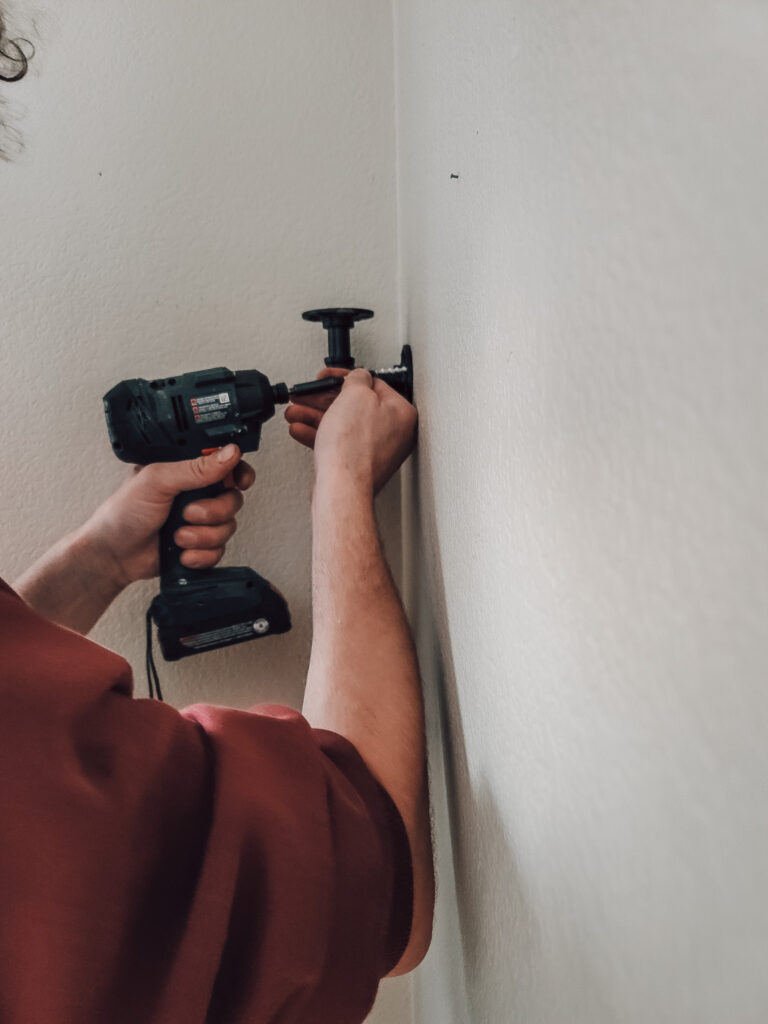
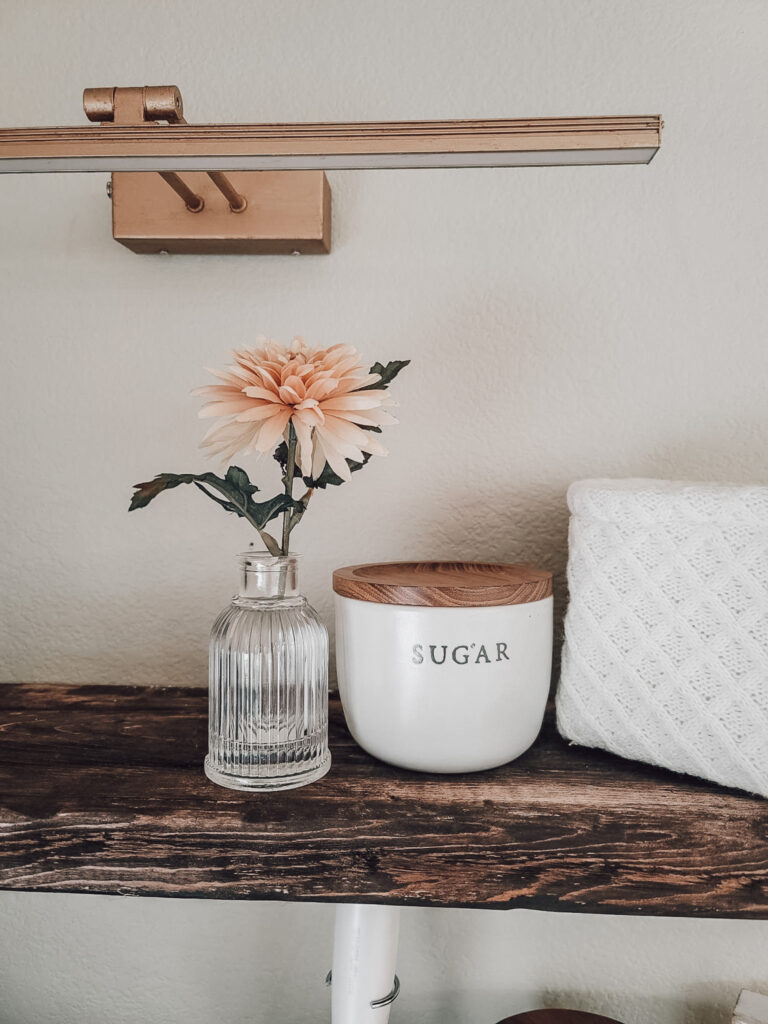
We added metal pipe brackets to our walls to hold the shelves.
The shelves are 12 inches apart and 22 inches away from the top of the cabinet.

Materials:
- 2 – 31 inches long, 1.5 inches thick, 7 inches wide pine boards
- Dark Walnut Stain
- Wire Brush (to use with a drill)
- Cordless Sander
Decorating the DIY Coffee Bar
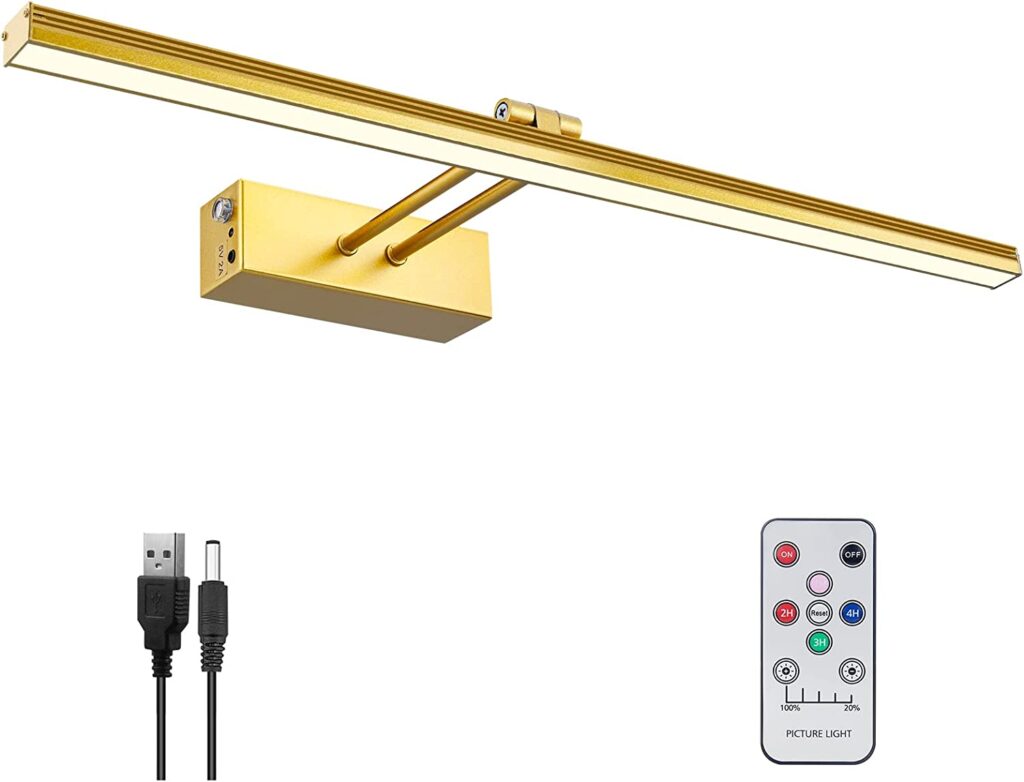
The crowning jewel of this project was the remote-controlled picture light that I snagged from Amazon. It is only $34 (at the time of this post) and was completely worth it!
If we ever need to buy another picture light, this is the one I will be going with! You do not need to wire anything, the lighting is gentle and warm, and it recharges like a breeze. The kit even comes with a bracket to make taking the light on and off the wall simple.
I was disappointed with the gold color of the light so I Rub n Buffed the light with an Antique Gold Finish.
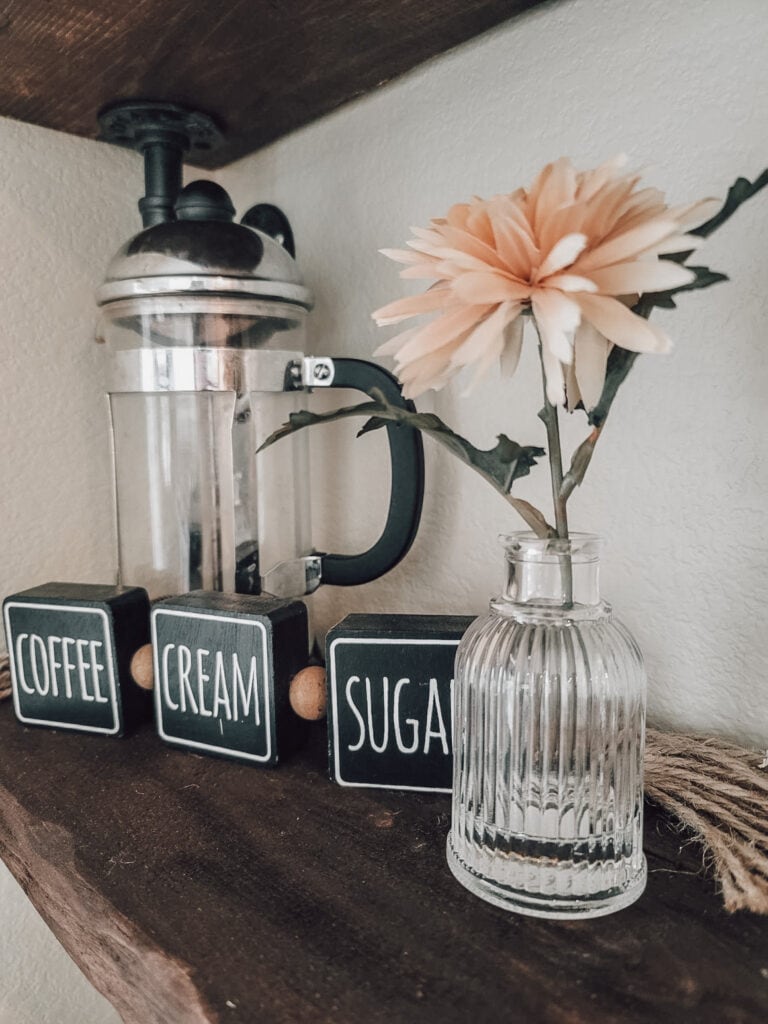
One of the really nice things about this DIY coffee bar is that I can switch out the decor based on the season. Right now I have some fun winter greenery on the table, but also an adorable flower on the shelves that I picked up from the Hand and Hearth Spring collection.
The coffee and sugar jars also came from the Hand and Hearth collection and I find those pieces absolutely a treasure! They will be staying there for a long time!
How do you Make a Coffee Bar on a Budget?
From the start to finish, this project was just over $200, which seems like a great deal to me! Building materials, paint, and supplies are currently on the rise so this project definitely could have been done cheaper in the past. You can find all our favorites from this project in our Like to Know shop!
I love our new coffee bar and I hope that it inspires you to create your own!
Don’t forget to pin for later!